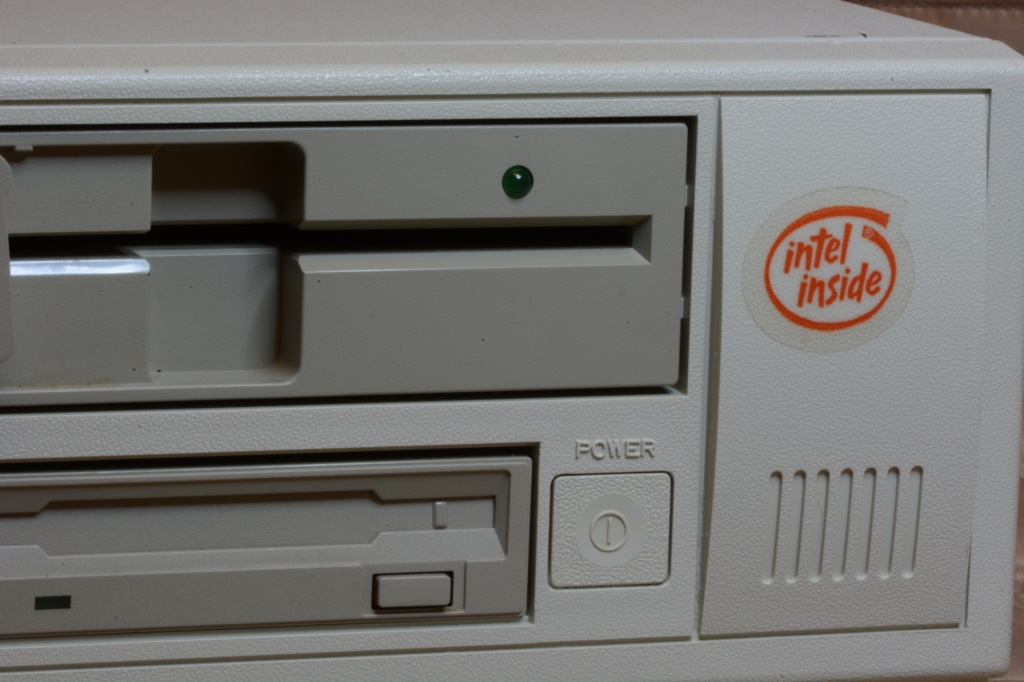
If you’re feeling nostalgic and want to play some computer games from the late 1980’s or early 1990’s, you’re going to have trouble running them on your modern computer. Sure, there are ways to make it run, like using an emulator for example; however, that hardly compares to the full experience. It doesn’t get more realistic than when playing a game on period correct hardware. After pressing the power button, you hear the hard drive spin up to full speed. Then you hear the heads thrashing about and see the LED indicator flash in unison while the computer boots. Once the operating system has loaded, you physically insert a floppy disk, hear the seeking of the tracks, see the floppy drive LED, while waiting for the information to load. All of these tiny things add up to a truly nostalgic computing experience that you don’t quite get today.
So you want to be a hero… err I mean, play old games? Sure, “Hero’s Quest” might run on a 286, but it will be awfully slow and tedious. Then there’s the CGA/EGA color pallet incompatibilities to deal with. It might run better on a 386, but if you want to maximize the number of retro games from this era that you can play on a single computer and get the best performance with the nostalgic experience, I would suggest getting a 486 class machine.
The Intel 486 CPU came in various flavors. These were the SX and DX, DX2, and DX4 models, and the main difference was that the more expensive DX contained an onboard math co-processor.

Now that we have a general idea on what class of computer to get, where do we find a nearly 30 year old piece of technology? Almost any obscure thing can be found on eBay, if you’re willing to pay the price. These days (2019) a non-working 486 may go for anywhere between $100 and $800 (US) depending on its condition and accessories, not including shipping. This seems crazy being that only a few years ago, if you came across one of these machines, you wouldn’t think twice about tossing it into the e-waste bin. You really don’t want to cheap out on shipping either, as getting a further damaged computer only increases it’s chance of ending up in a land fill. If you go this route, ask the shipper to pack it as if they were going to throw it across the room, because believe it or not, that’s what happens during shipping.
After coming up empty handed a few weeks into searching for a free or reasonably priced computer, I spotted a Packard Bell Legend 125 for sale for under $100 shipped. The listing details said it had keyboard and system error preventing them from getting into the BIOS settings. Something I naively felt could be fixed relatively easily.

A thorough examination is necessary to become familiar with any particular system. You should check to see if any previous repairs had been done and what is the state of the components. Sometimes you need to look really closely. During the era of 386 and 486 computers it was common to use a barrel style battery (as opposed to a coin-cell) for the CMOS battery backup. Unfortunately, after 10 years or so, barrel batteries eventually ooze battery acid all over the place, and damage the circuit board. In this particular computer, it looks like a leaking battery was replaced at some point; however, they never bothered to clean up the corrosion left behind. If left untreated, the battery acid will eventually eat through the motherboard and corrode all surrounding components and traces. Immediately to the right of the battery (pictured below at U49) was a fairly corroded surface mount chip (F151A).

Cleaning up this mess involves removing the barrel battery, so the area can be assessed and remediated. As is typical, on this board the leads were soldered directly to the battery, and they were very corroded, so I just cut them off directly at the board just to get the battery out of the way.

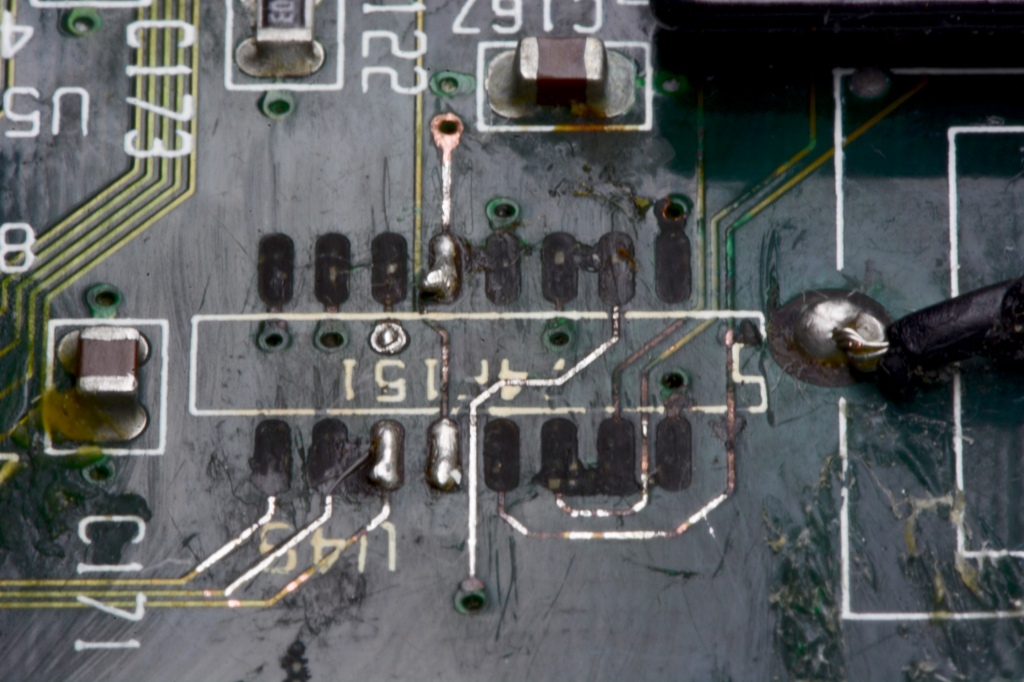
Next, you need to neutralize the battery acid. Contrary to popular belief, battery “acid” is actually an alkaline, which is a base, so I used vinegar to clean the area, and then lightly scrubbed it with a toothbrush and a small amount of baking soda. It looks much better, but there is still some corrosion visible on a few traces.

The F151A input multiplexer at U49 looked like it was in pretty bad shape. Continuity tests from the pins to the traces were failing.

After removing the battery and initially cleaning the motherboard, the computer still displayed the keyboard and system error messages. Pressing F1 to continue or F2 to enter SETUP had no effect. The keyboard was in fact recognized, since if you held a key pressed during POST, it would display the “stuck key” error. Researching online, a common theory was if the real-time-clock had no battery source, it may prevent it from proceeding.

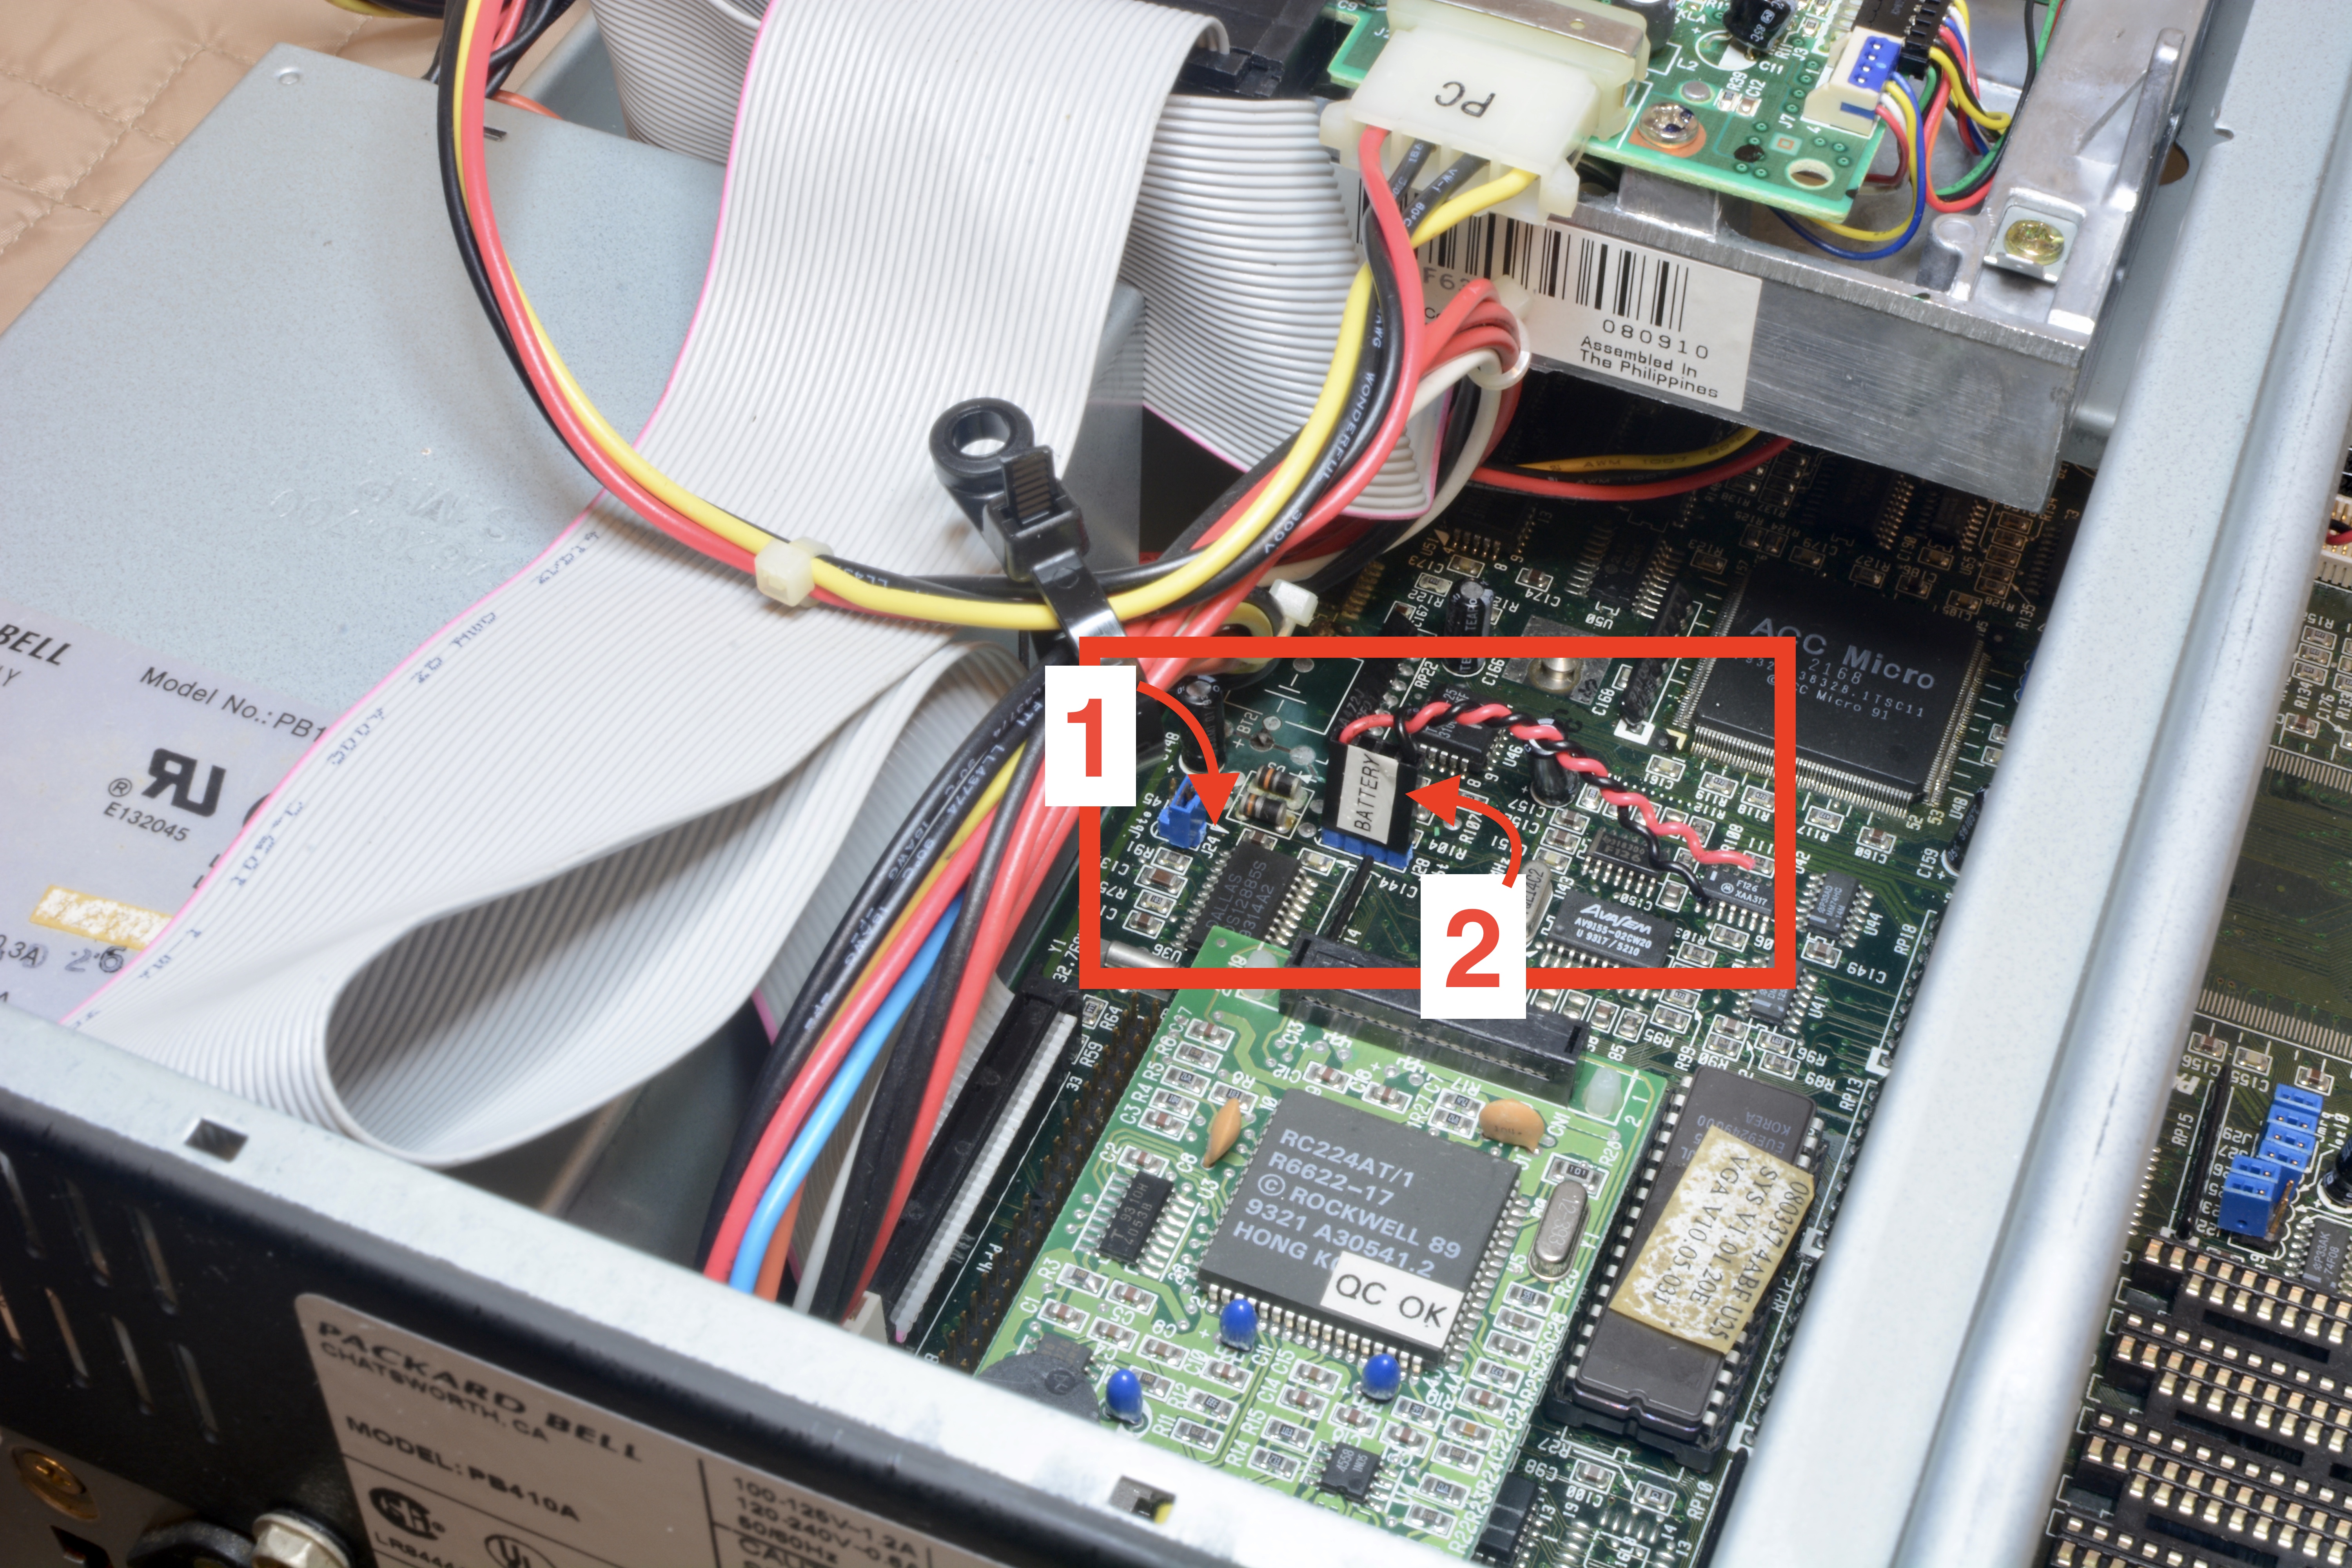
According to the jumper settings printed inside the case, J24 enables or disables the on-board battery. Some motherboards have an option to connect an external battery source, and in this case, the battery can be connected to J28.
On this board I removed the jumper on J24 to disable the on-board battery (pictured in #1 below) and found an old PC speaker connector (pictured in #2 below) that could be used for the external battery.
The external battery source consisted of 3 x AAA batteries providing 3.6 V to the board. Yes, I do tag and inventory all of my batteries. This set of 8 was purchased on April 2019.

Unfortunately, even with the external battery source, the computer still would not load into the setup utility. I took the board out of the case, and started testing continuity on the traces of the corroded chip at U49. As previously mentioned, several traces in fact were severed due to corrosion.

Attempts to re-tin the legs of the chip were not successful due to the extent of the corrosion. As heat and flux were applied, the legs immediately deteriorated. In the process of heating up the legs, the pads (which were also heavily corroded) lifted off of the PCB. This was my first time desoldering a surface mount chip, and it definitely shows. I should have spent some more time practicing on garbage boards first.
The bottom of the chip was pretty gross. If left on the board, the corrosion would likely have spread causing further damage. Most of the pads can be seen still attached.

Because the board was so damaged (from the corrosion and from me), it was not possible to simply solder on a new chip. Not only that, but the F151A chip is no longer produced. I was able to order a SN74F151BDR which is a pin compatible replacement. I also got a small breakout board for the chip, so I could make new connections on the motherboard. The chip cost $0.64 and the breakout board was $1.25.

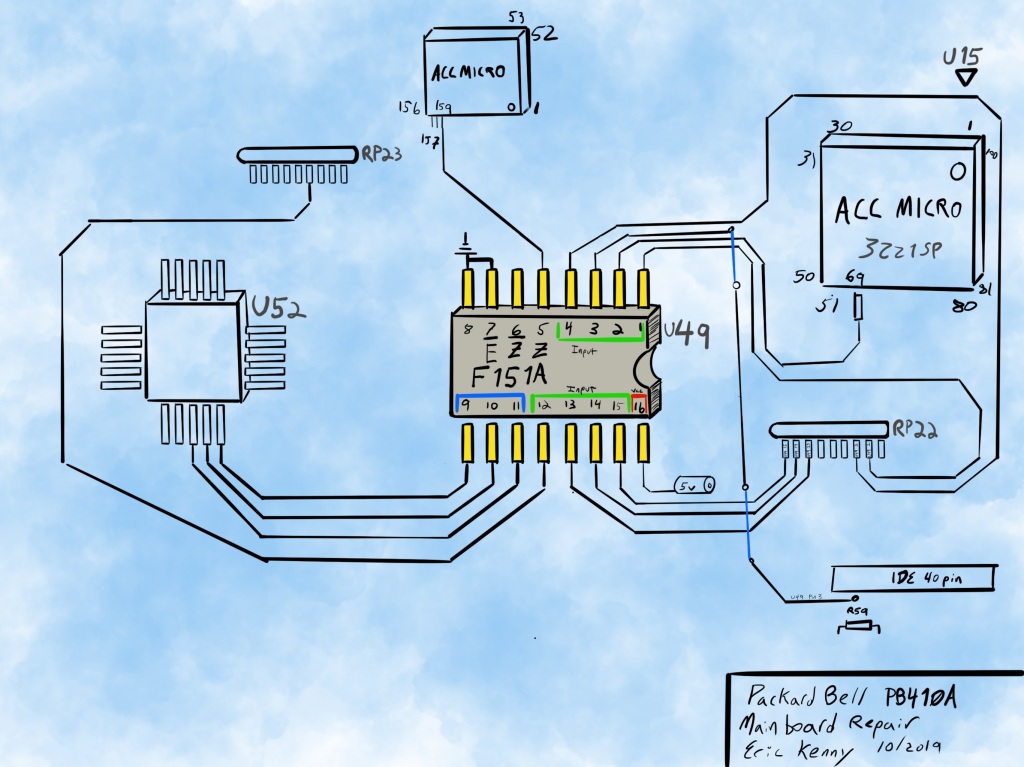
All 16 pins and traces needed to be mapped out to identify new solder points for the breakout board. This took a lot of time an patience, following the traces, testing continuity, and finding a suitable place to solder on a jumper wire. Eventually I mapped out all of the pins and began attaching the jumpers to various vias and resistor packs. Some of the pins went directly to the motherboard’s controller chips, so I had fairly high confidence that this was an important chip after all.
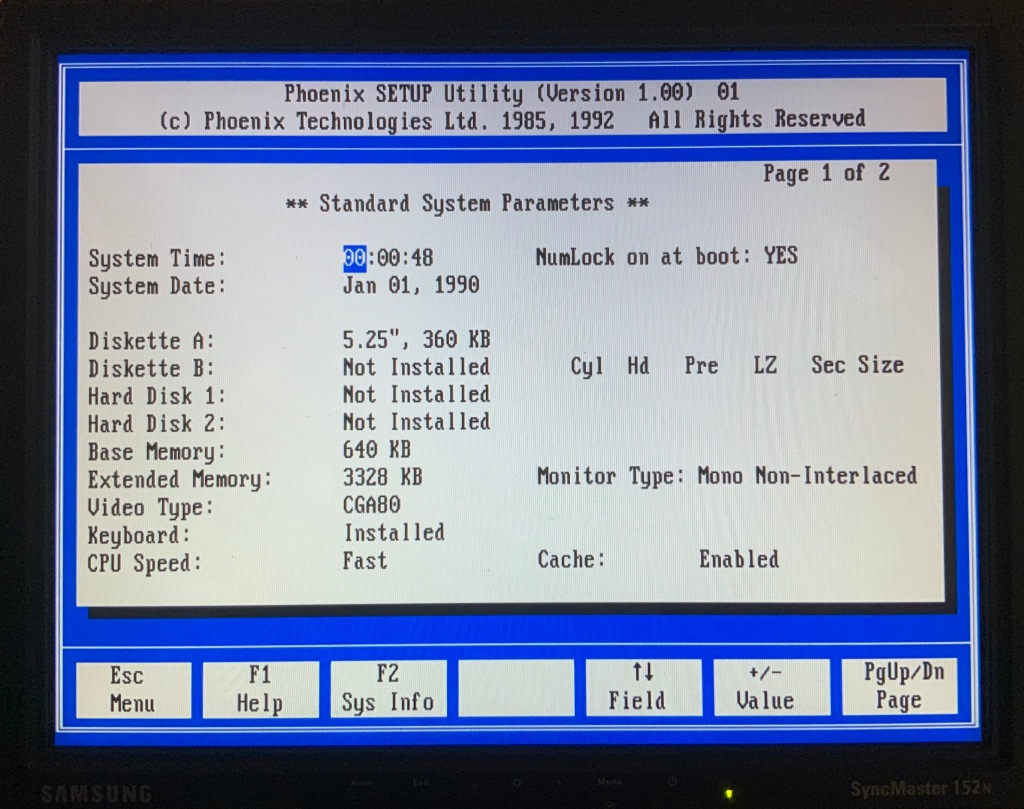
After triple checking the connections and that there were no solder bridges, I plugged in the power supply and did a smoke test. To my complete and utter amazement, the machine completed the POST and allowed me to enter the BIOS! Total cost of repair was under $2.00!
Now that the PC is working again, I have plans to upgrade the RAM, install some additional L2 cache, and add a storage device for an operating system.

My very first IBM compatible PC was a PB Legend 125. I bought it brand new when I was in school to learn computer programming. I was able to add a SCSI card that connected to an external 1X CD-ROM drive, a dot-matrix printer, and (of course) a Soundblaster 16. Played a lot of Wing Commander, Joe Montana Football, and other CD-ROM titles of the era and also launched myself a career in software engineering that continues to this day. These days I enjoy restoring vintage machines for fun but for some reason I think of old Macs as collectible but not old Windows machines. That is, until today. I ran across a different 486 machine on CL and it got me pondering my old Legend 125. My first computer, full stop, was a Commodore VIC-20 and I brought one of those back to life last year. Your post has me thinking I might just have to keep my eyes peeled for one of these. Thanks for the memories!!
LikeLike
I’m running into a similar issue with a Packard Bell that I’ve been trying to rescue. The system powers on, no POST, no beeps, nothing. Battery did leak and I took it off and did similar except I used a CR2032 battery holder in the hopes I could get away with it. I have the same corrosion on the chip and I’m wondering if that’s the culprit as well.
LikeLike
We had a Packard Bell Legend as well, we replaced the 5.25 floppy with a CD-Rom and installed a sound blaster, I was pretty young at the time, but I do remember it having TrueBit colour if memory serves, and we played Myst on it as well.
LikeLike